
| Dulcimers | Lessons | Our Work | Store | Woodshop Blog |
From a rough burl to a finished bowl, step by step.
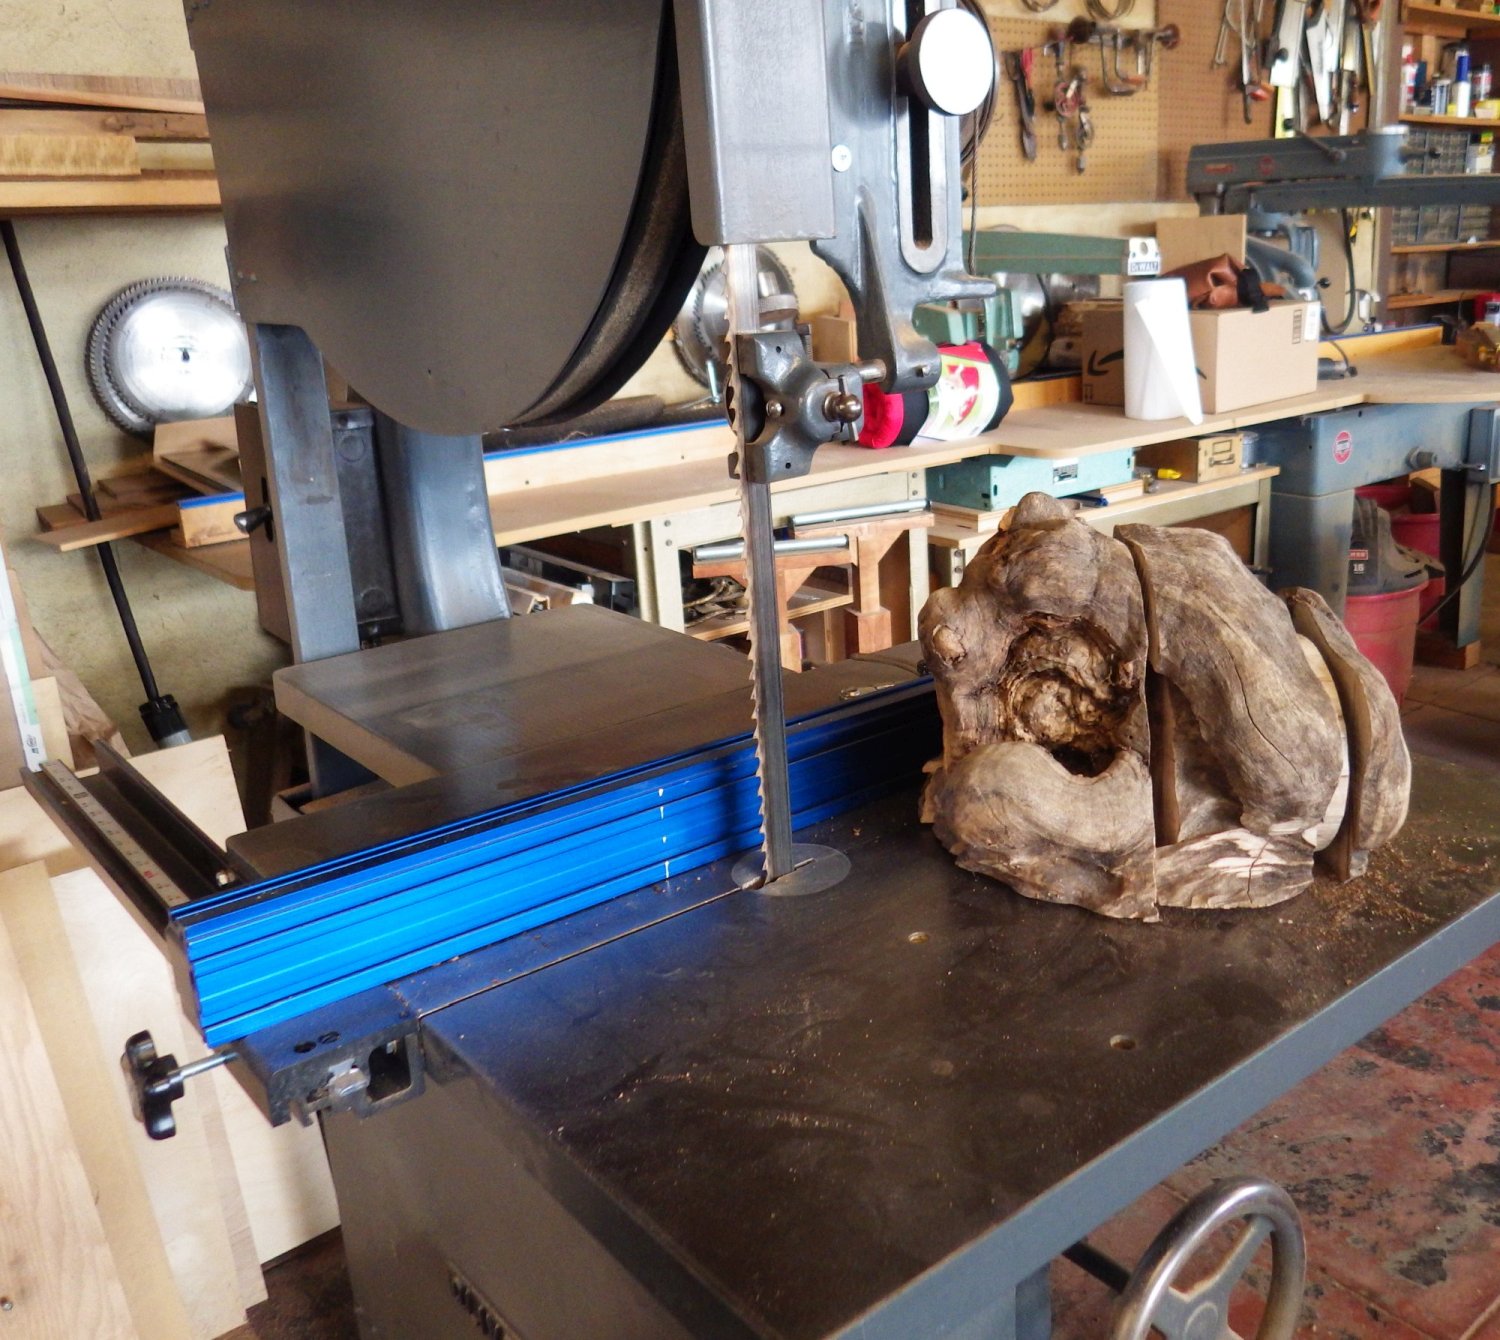
This burl has been sitting around the shop for a while. It is so weathered that it isn't possible to tell what kind of wood it is. It's also impossible to tell if the inside is hollow or not, so it's hard to know where to start cutting. This looked like the best bet to find a solid turning blank.

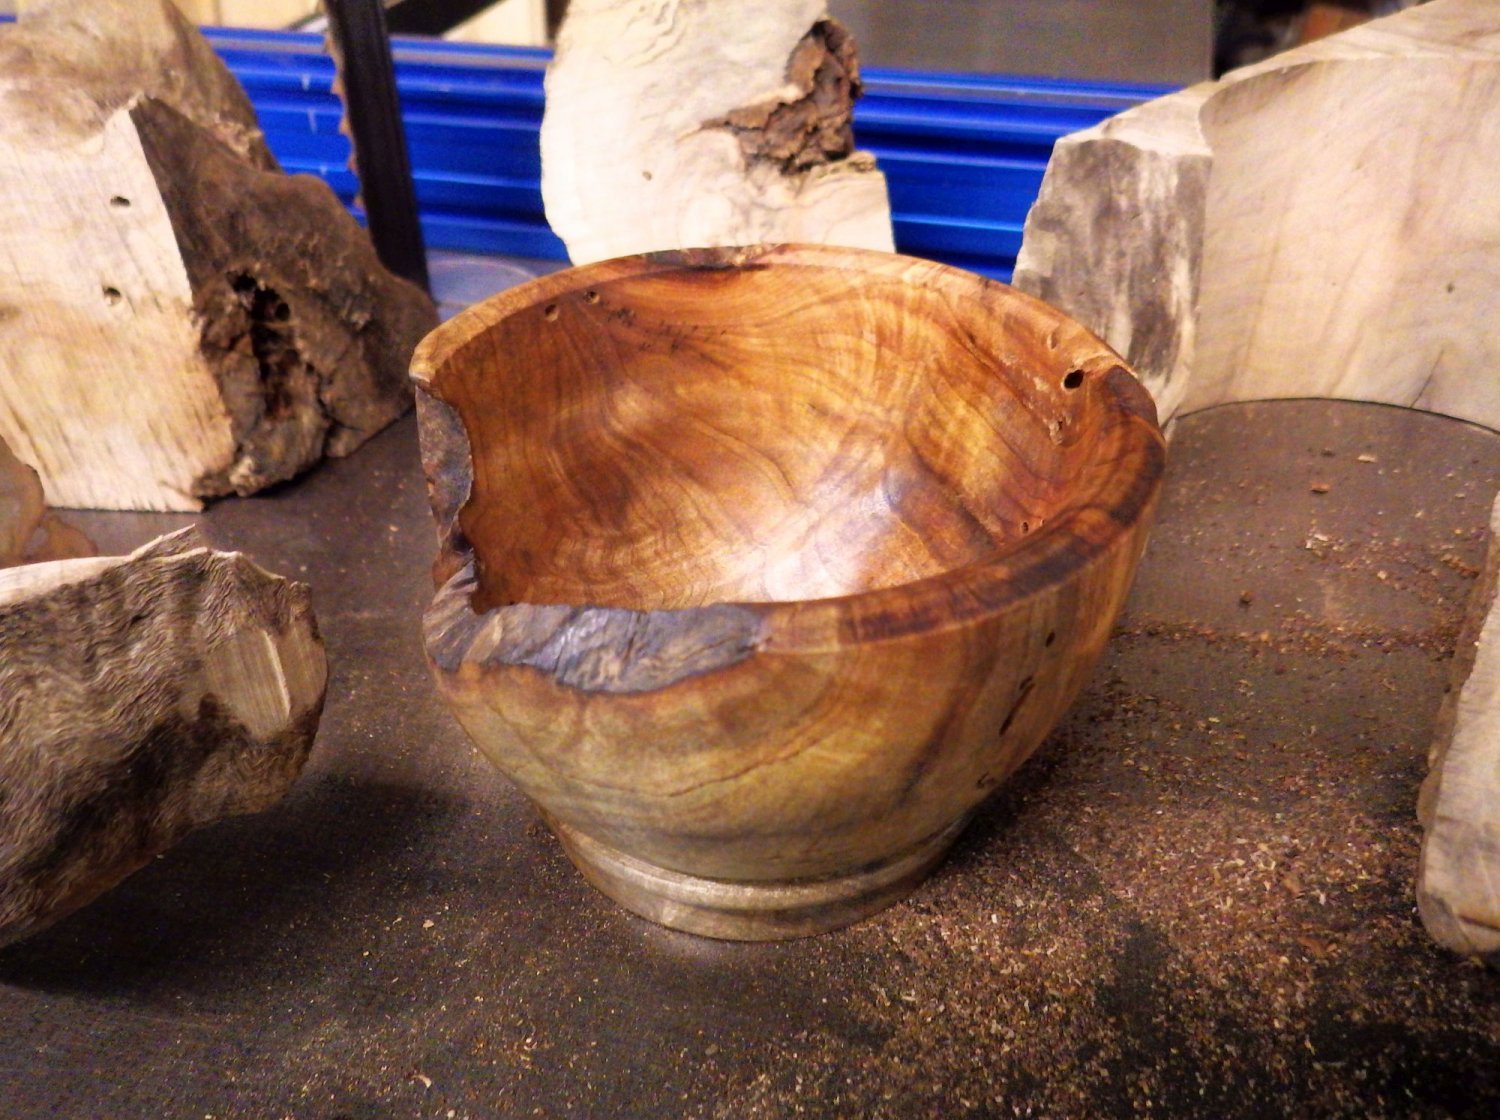
This burly was pretty gnarly, with lots of voids and fissures, but it yielded a clean 6" diameter turning blank with some live edge on it.
After deciding how to cut the blank out of the burl, it is time to decide which end to attach to the faceplate; the faceplate end will become the top of the bowl, and the outside end will become the foot of the bowl. Here, I've decided to put the roughest end on the faceplate, so the finished bowl will have a lot of live edge along the rim.
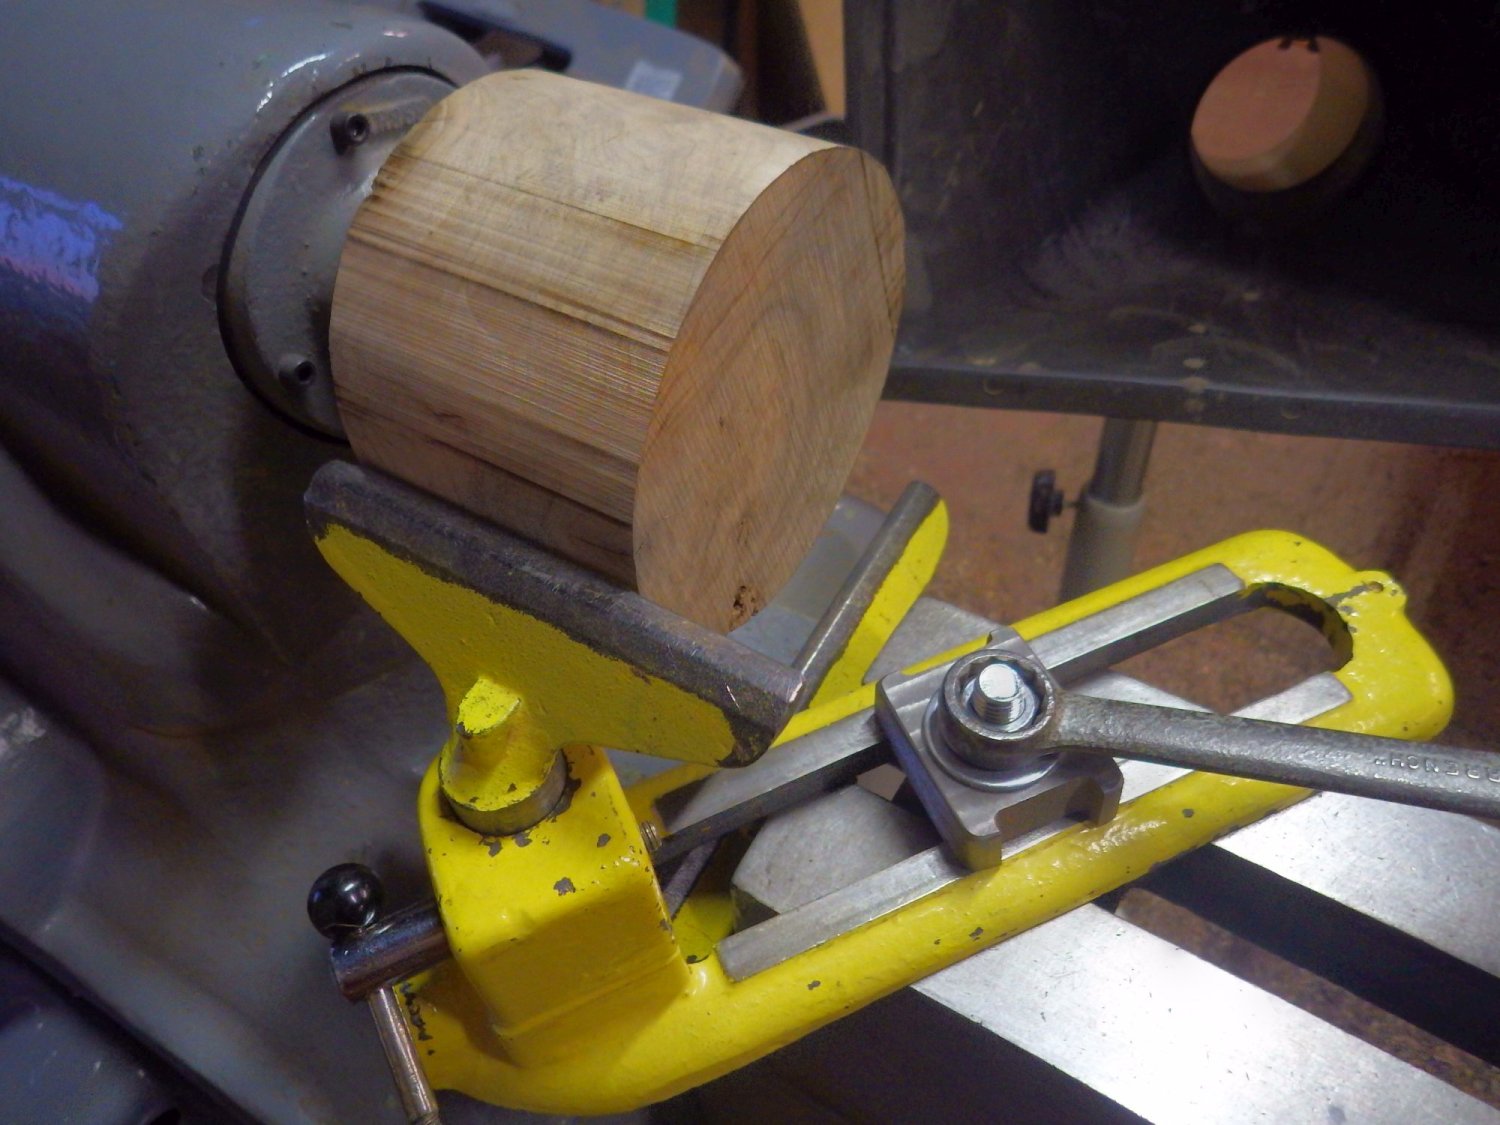
Initially, the plan was to turn this into a shallow bowl on a long stem, like a vintage sparkling wine glass, but the blank quickly revealed strong curly figure. It would not make sense to cut away such beautiful figure just to create a specific form. That would be like creating extra work in order to make the piece less attractive. It is important to look for the point of nfar - no further action required - when turning the initial form of the piece.
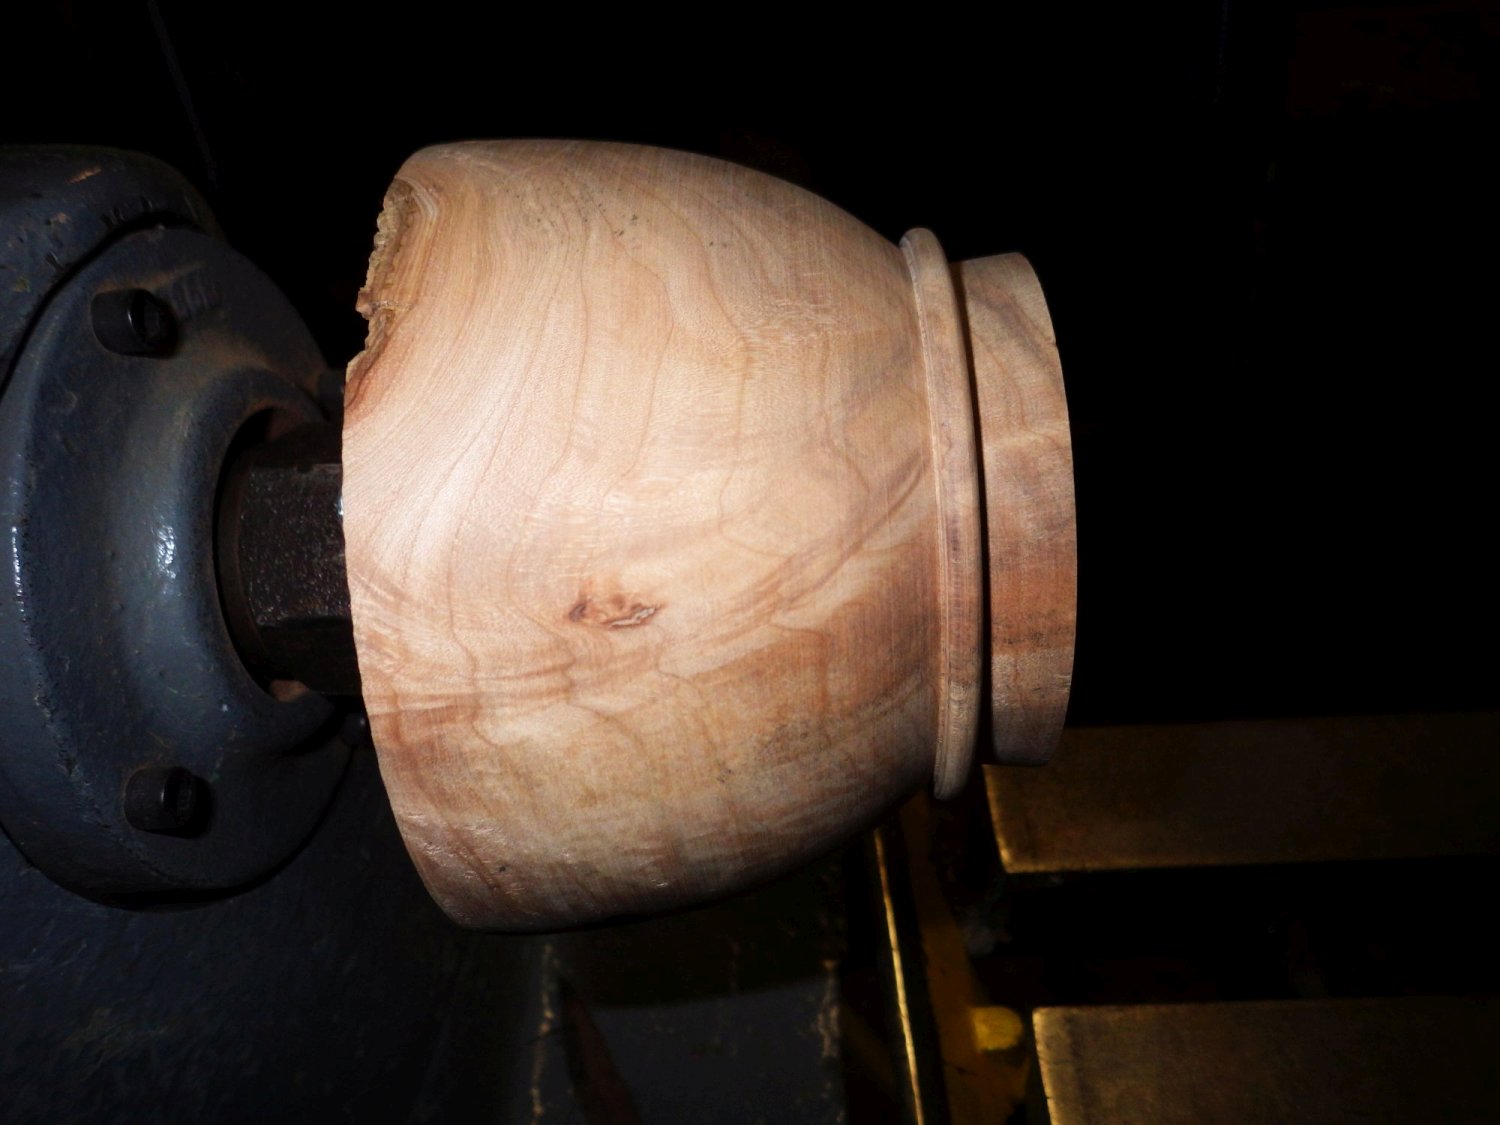
At this point, the outside finish is cleaned up with a scraper, and then lightly sanded. No tool marks or tearout should be present before chucking and hollowing the form. That's because this is the best setup you're going to get to finish the outside of the piece, so do it now.
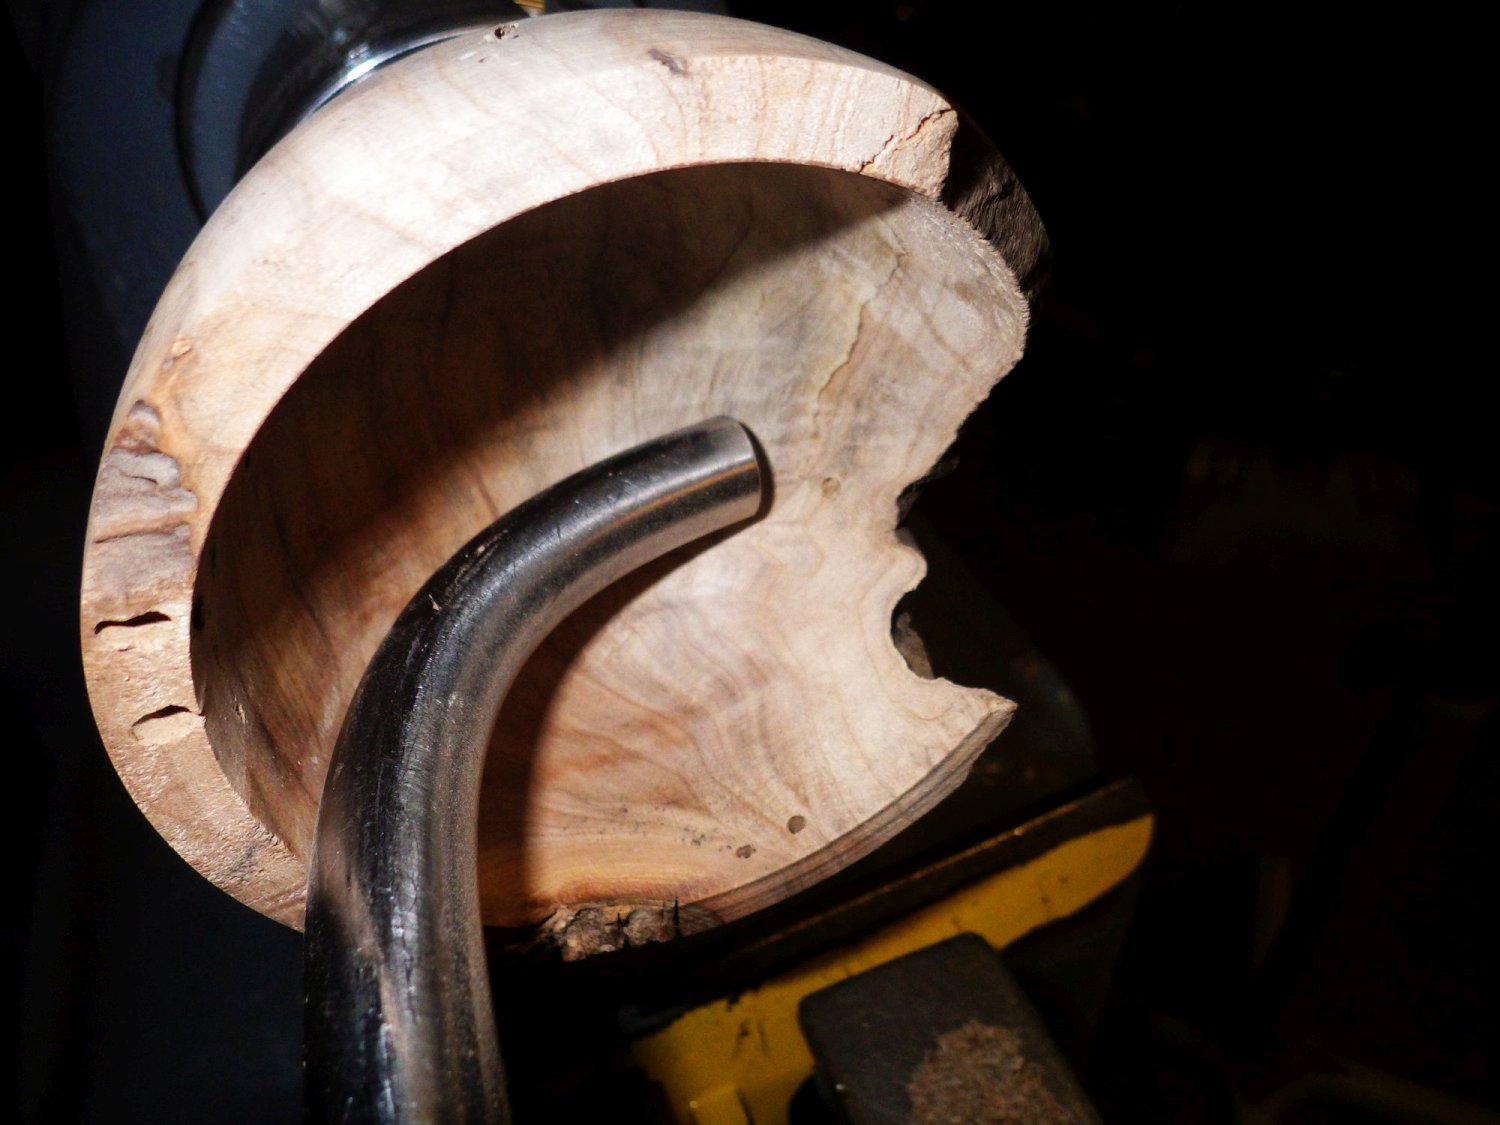
The bowl now goes into the chuck, and is hollowed out; first with the rough gouge, then with the smooth gouge. The rough gouge cuts fast, but leaves a bit of tearout. The smooth gouge doesn't remove much material, but makes a nice clean cut. On pieces with a rough or jagged edge, such as this one, it is not possible to sand inside the bowl. The lathe turns counter-clockwise, and that pointy edge is going to catch anything that touches it and take it for a spin - such as your sandpaper or hand. So this piece is finished with a scraper, and not sanded inside. Again, when dealing with the thickness of the bowl and the radius of the inside - in this case an elipse - remember nfar - determine the wall thickness, make an attractive and smooth inside radius, clean it up, and move on. No further action required.
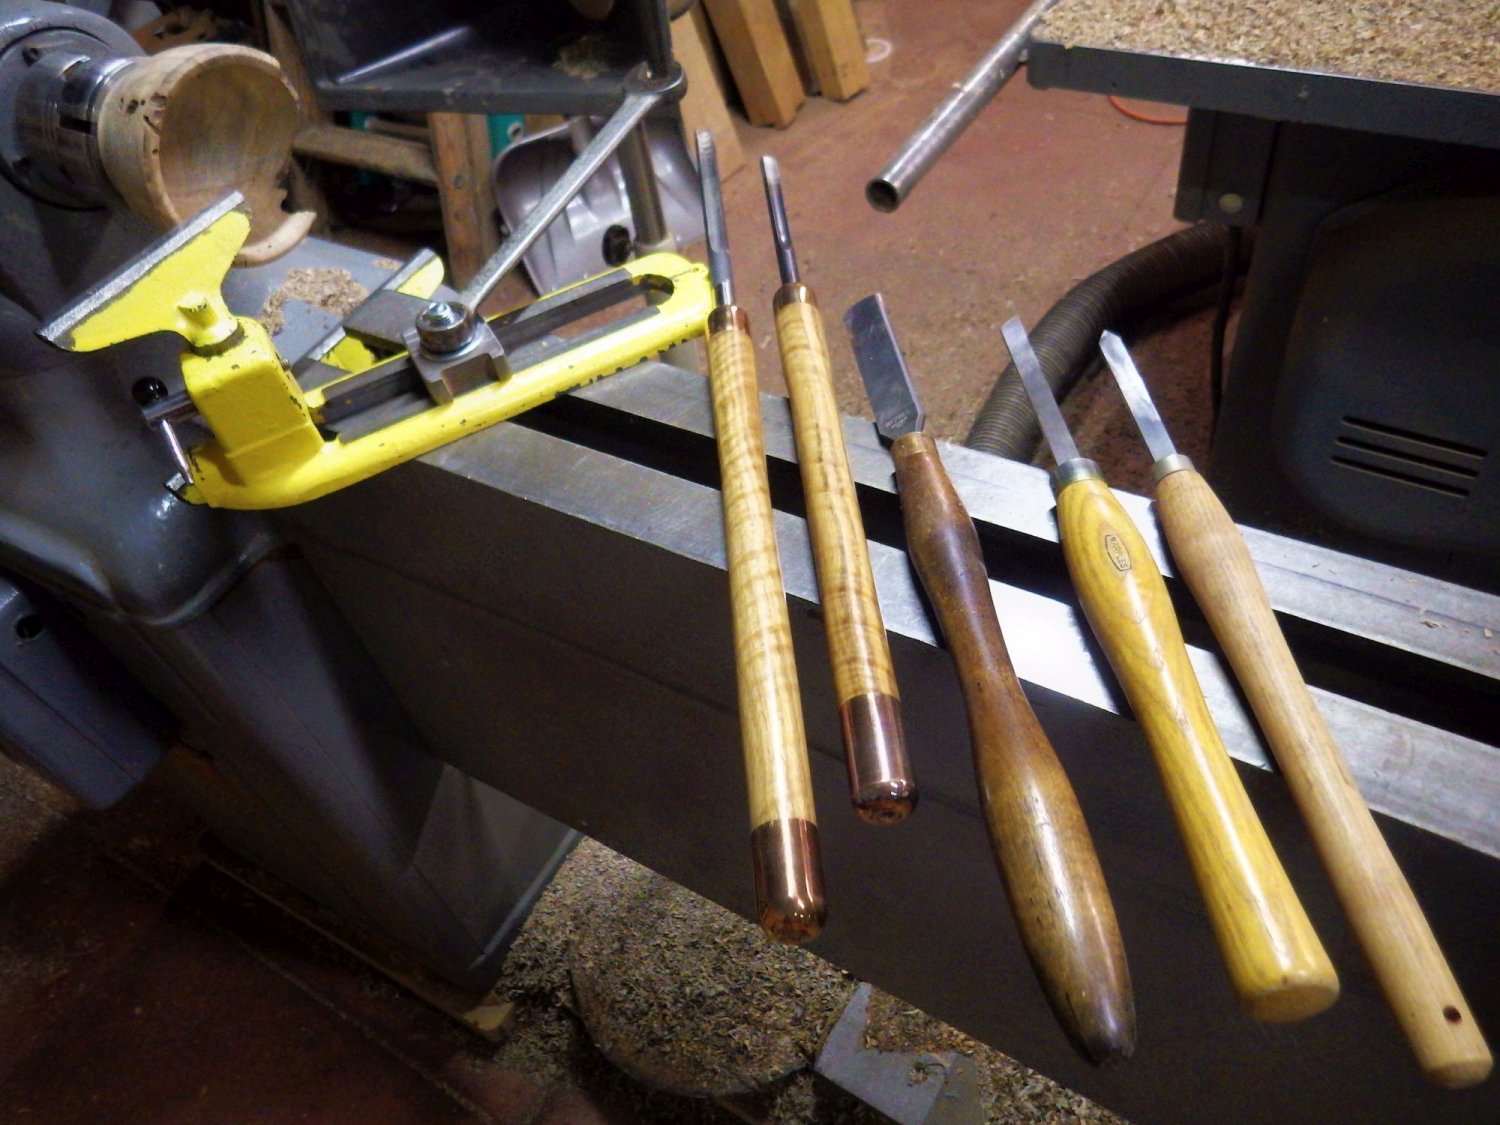
These five chisels were used to turn this bowl. From left to right: rough gouge, smooth gouge, slightly rounded bevel scraper, 1/2" skew chisel, and pointy flat scraper.
The ferrules and counterbalances on the gouges are made of solid copper, and the handles are long. If you give the machine the mechanical advantage, your tool will catch and tearout material, or explode your bowl altogether. By keeping your toolrest close to the work, and using a gouge with a long heavy handle, you have all the leverage and therefore all the mechanical advantage.
The lathework is done, and the bowl given a coat of tung oil for protection. Now to machine the base into a more pleasing shape.
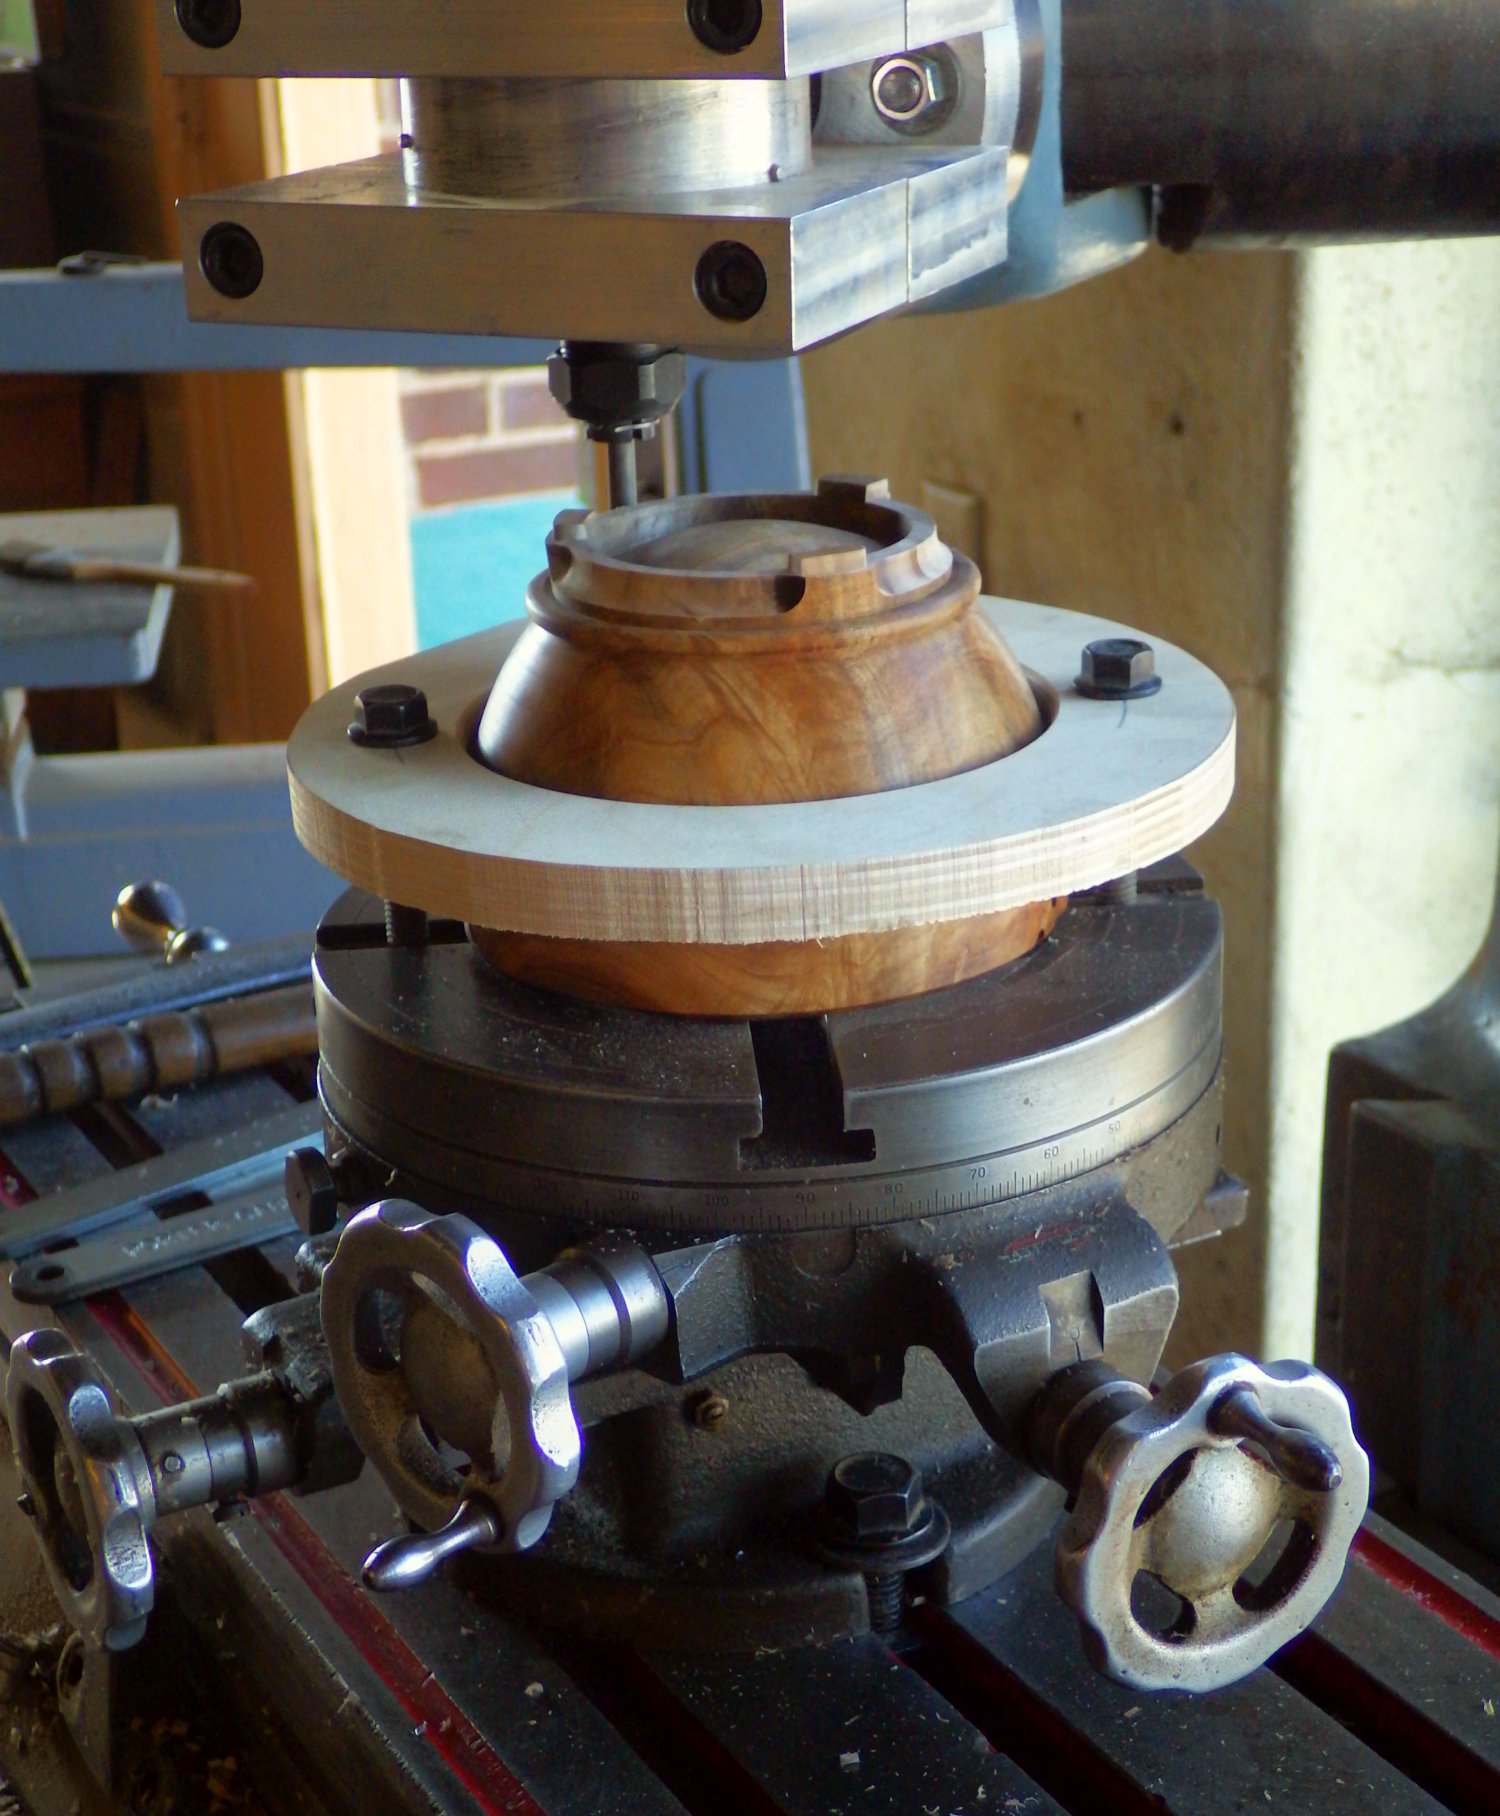
With the bowl mounted to the rotary table, and using a router mount on the Bridgeport, the base recieves further machining.
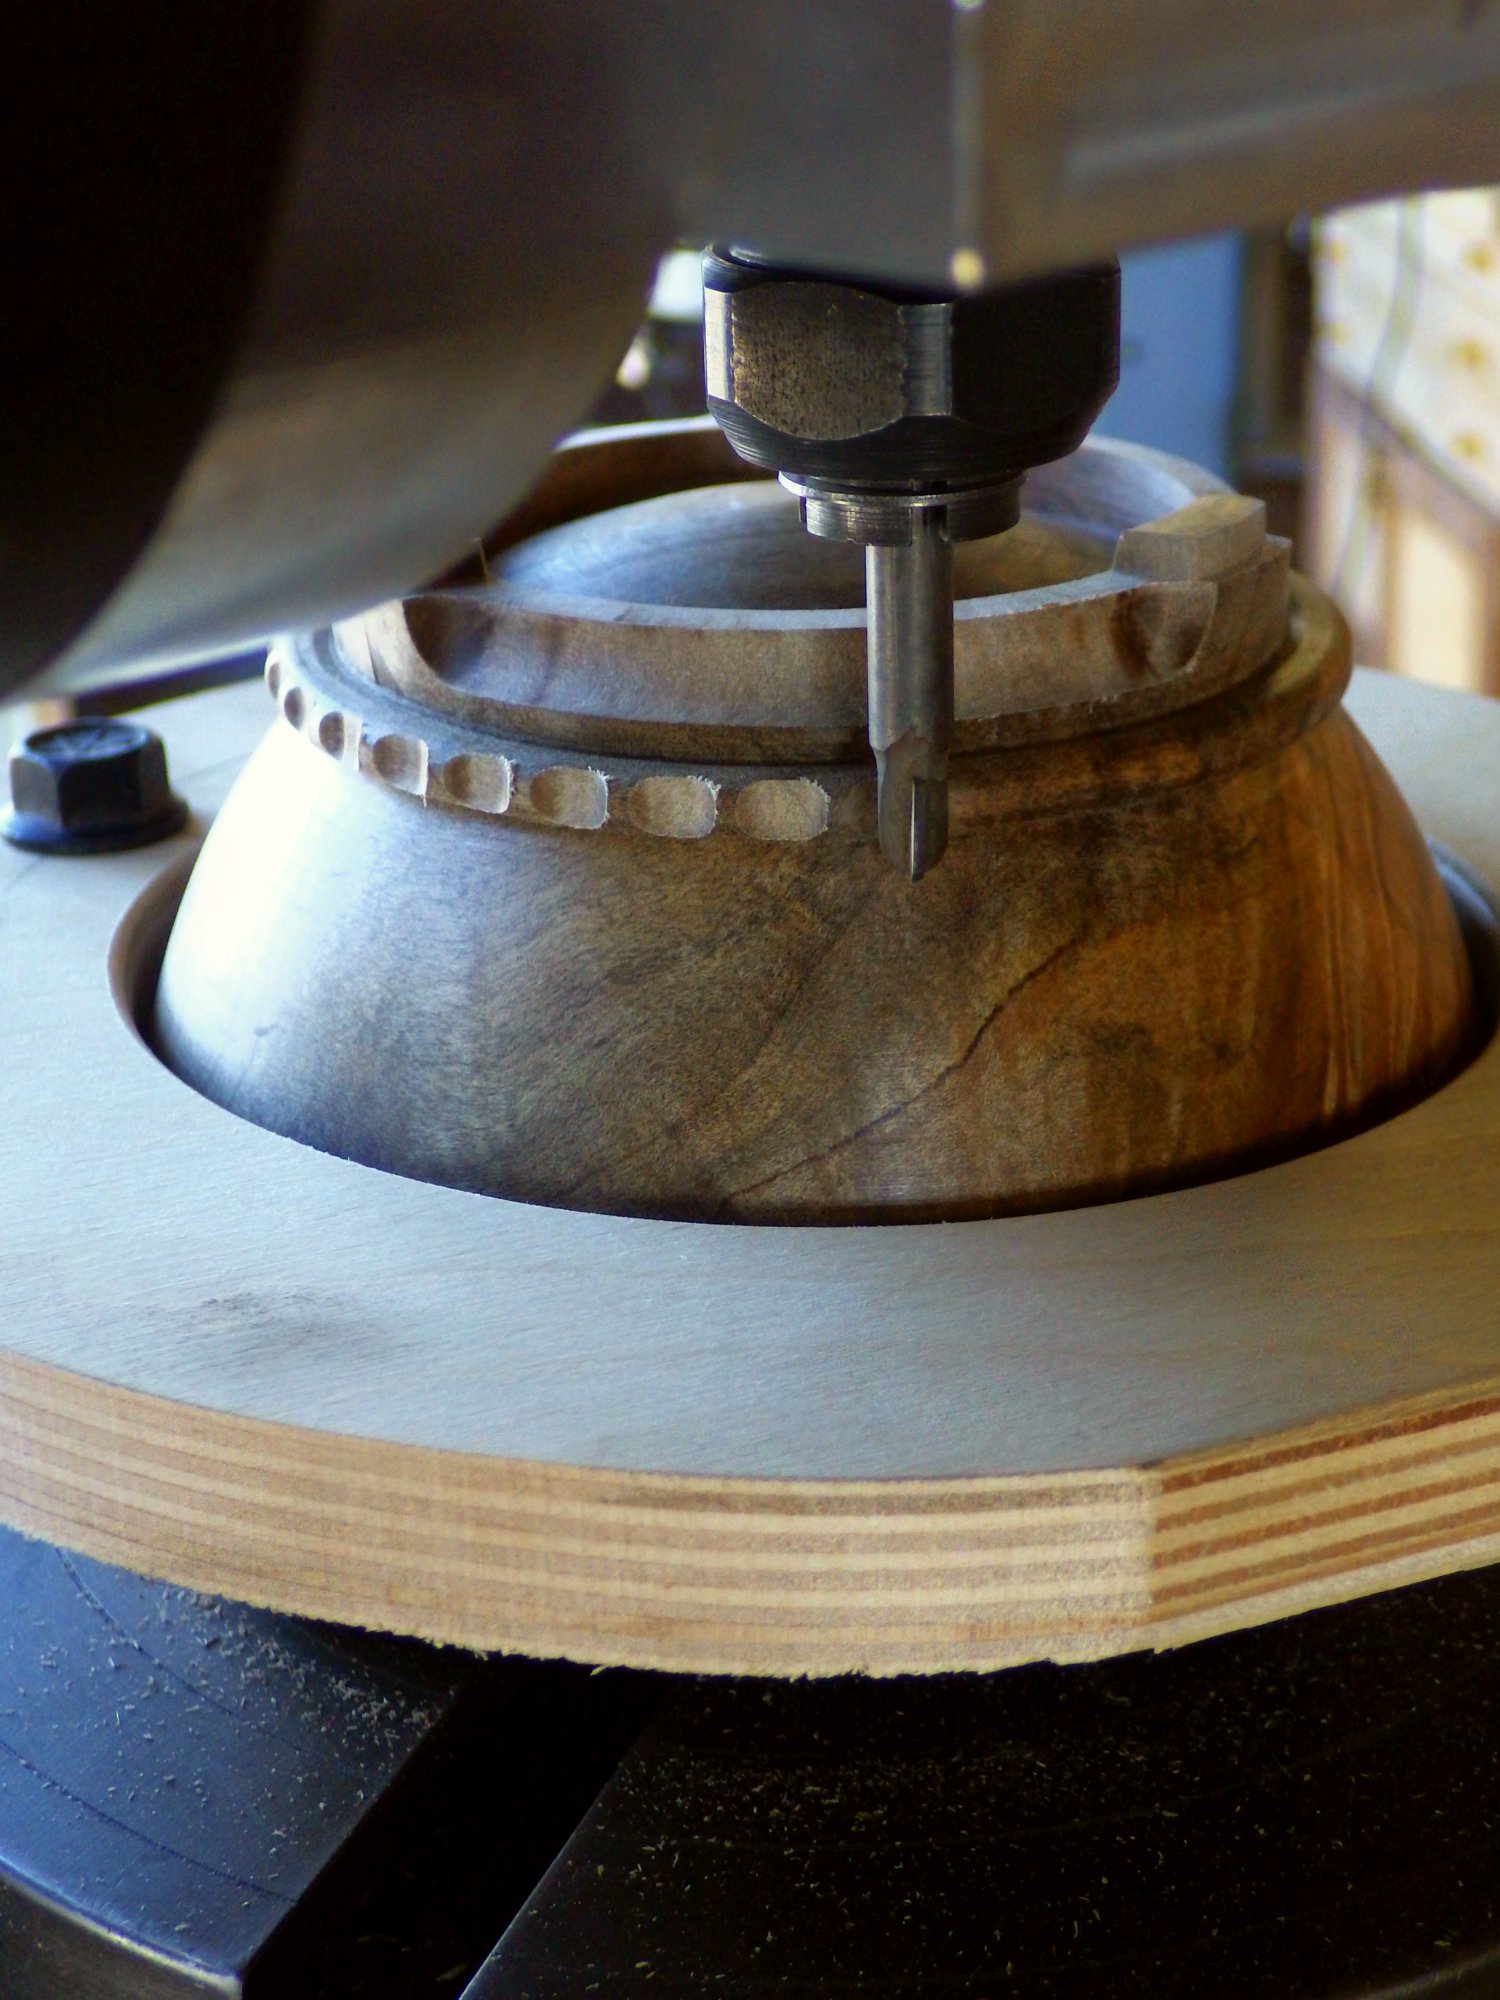
The turned ring above the dovetail foot is faceted for additional detail.
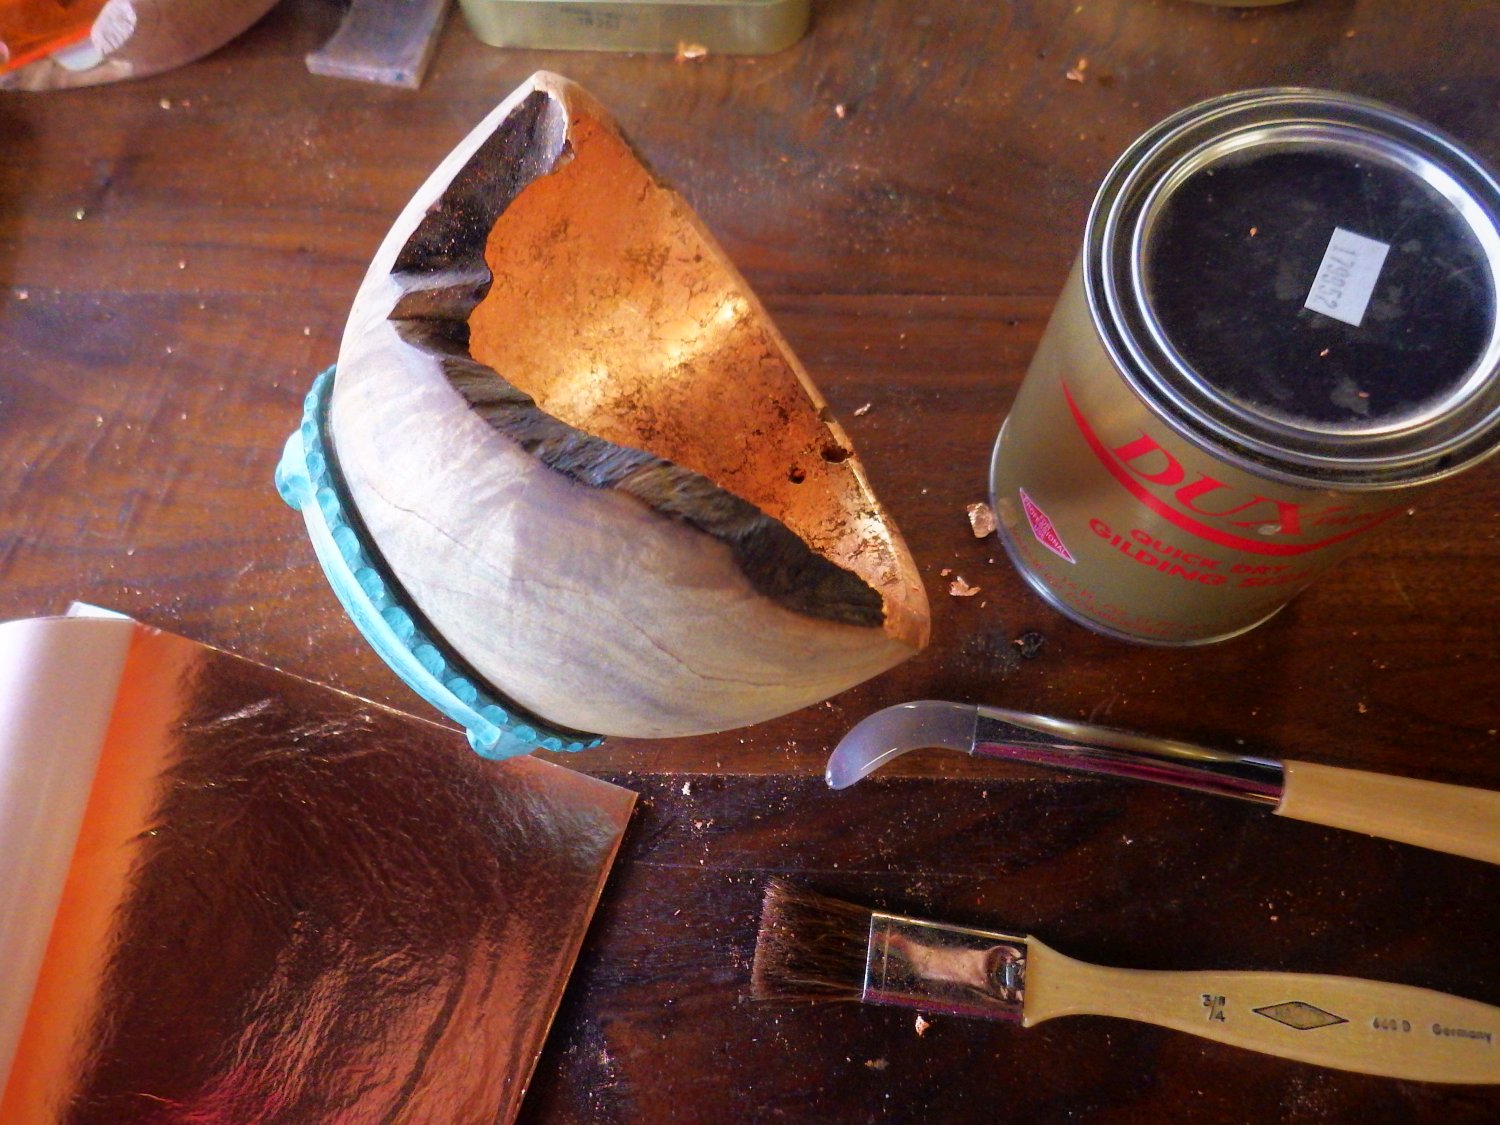
The inside and rim of the bowl has been gilded with copper leaf. The base hase been painted with a green-tinted Venitian plaster based ground, and is now ready for sizing and gilding.
The quick drying size is ready for leaf in around three hours after application. Regular size requires 12 hours to cure before gilding.
The mop brush cleans up the overhanging bits of leaf, as well as gives a gentle initial pressure of leaf onto size.
When the gilded size has cured further, the leaf can be gently burnished with the agate. The leaf is 0.1 micron thick, so everything is done with the lightest touch.
Dark Hollow Dulcimers 256 Durham Road, Ottsville, Pennsylvania 18942